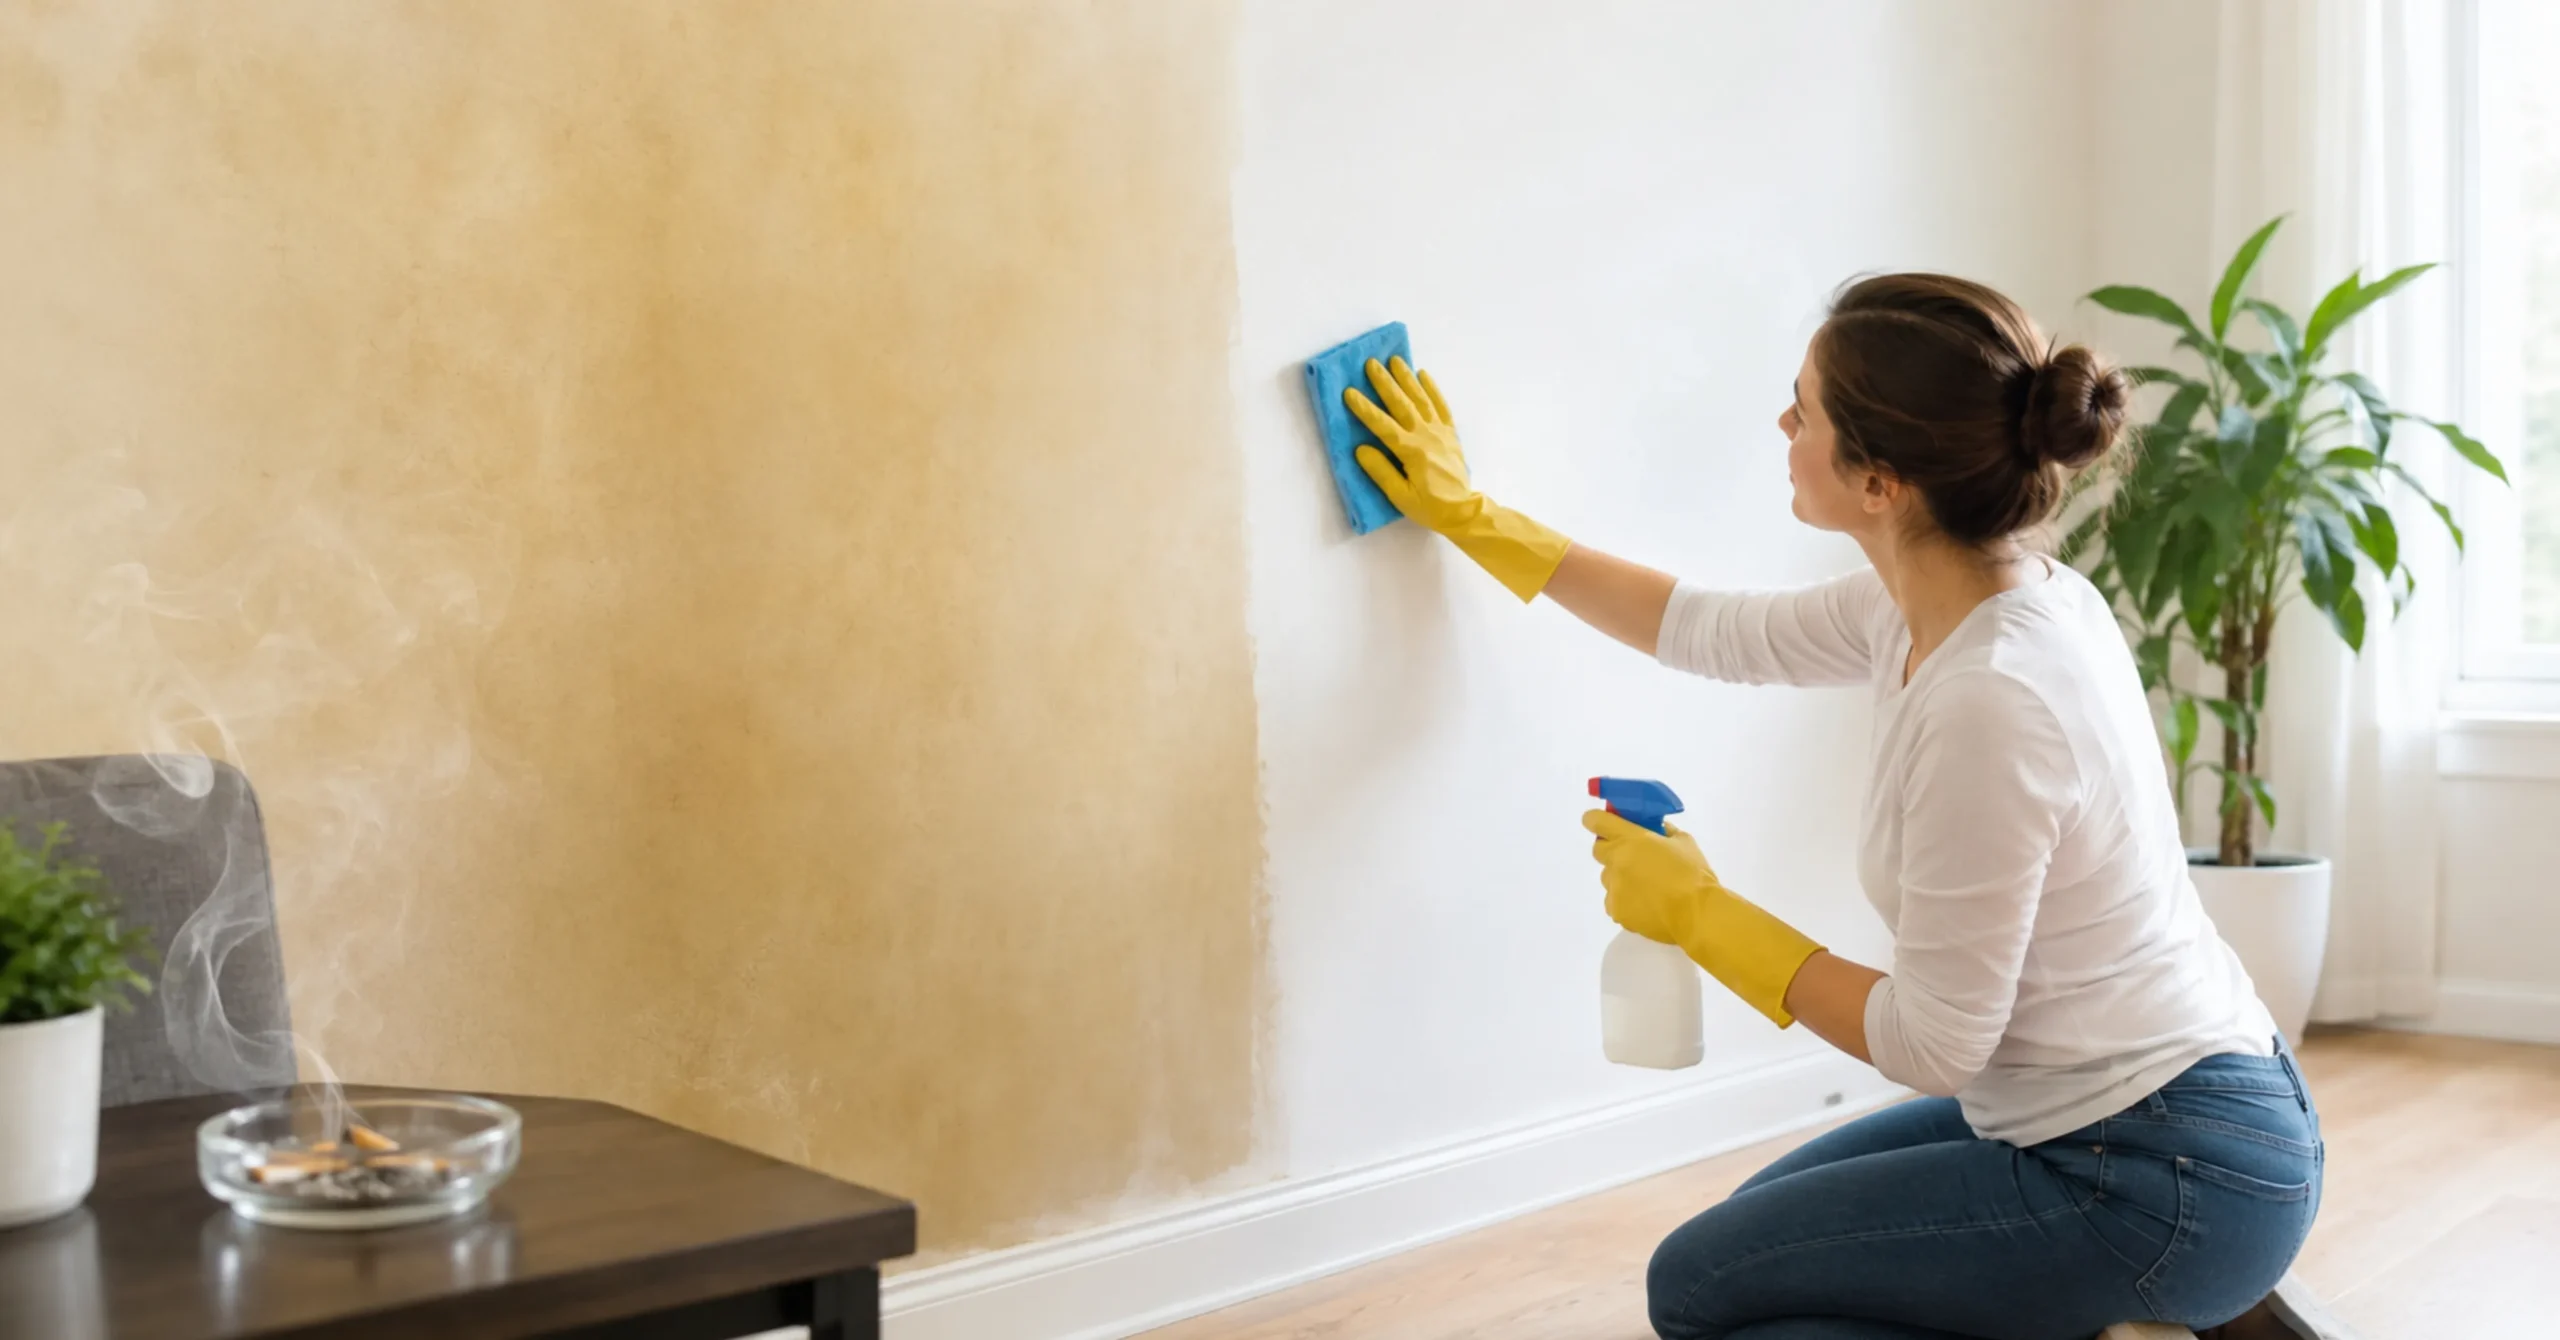
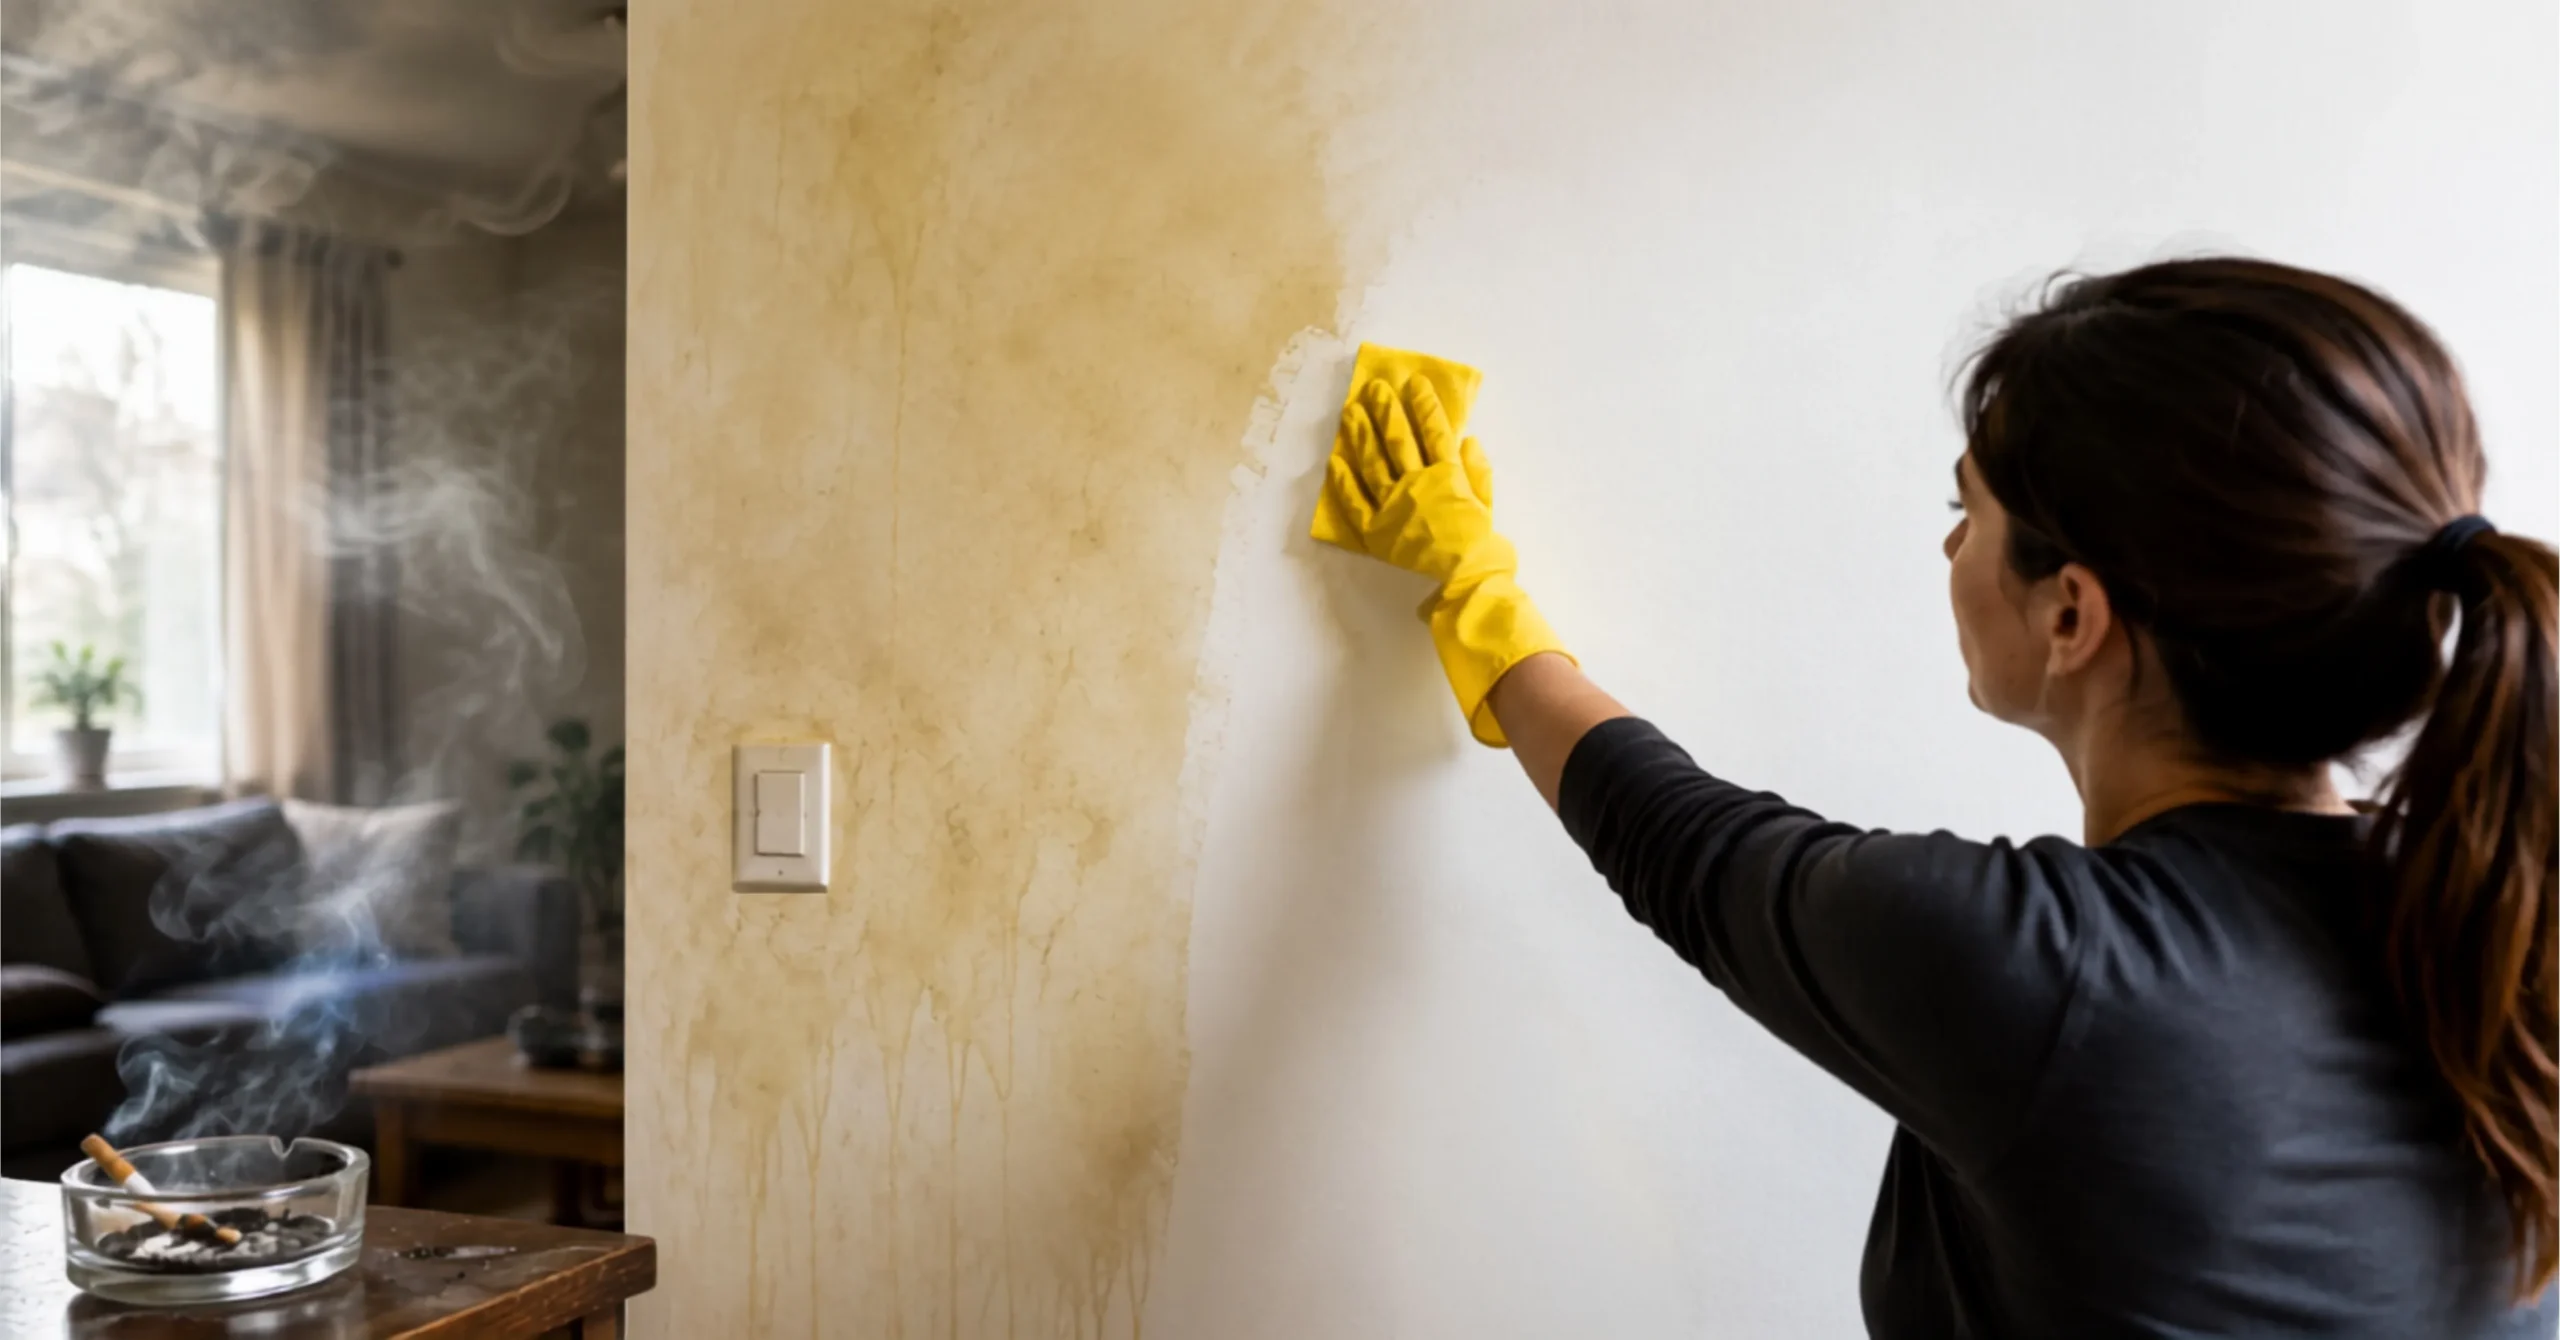
You move into a new rental in Houston, pull up the blinds, and notice the walls have a yellowish-brown film, like someone tea-stained the entire living room. The previous tenant smoked indoors for a decade. You open a window. The smell doesn’t leave. You scrub one section with soap and water. The smell still doesn’t leave. You start Googling at midnight.
Sound familiar? If you’re trying to figure out how to remove cigarette smoke from walls, you’ve probably already realized this isn’t a regular cleaning job. Tobacco residue is chemically sticky, deeply penetrating, and, here’s what most blogs won’t tell you, it can keep releasing toxic compounds into your air for years if it isn’t properly treated.
This guide covers everything: the science behind why smoke clings, a surface-by-surface breakdown, the exact products that actually work, what renters across California, Texas, and Florida need to know, why that $8 bottle of white vinegar alone won’t solve your problem, and when it’s time to call a professional. No fluff. Let’s get into it.
Here’s an uncomfortable fact nobody wants to know: when someone smokes indoors, only about 20% of the smoke is actually inhaled. The remaining 80% drifts into the room and settles on every surface it touches, walls, ceilings, furniture, carpet, curtains, and inside air ducts. This is secondhand smoke, and it doesn’t just disappear when the cigarette goes out.
The sticky culprits are nicotine, tar, and volatile organic compounds (VOCs). Nicotine is an oily, slightly viscous molecule that bonds readily to porous surfaces. When it hits a painted wall, it doesn’t just sit on the surface, it migrates into the paint layer, through the primer, and into whatever material lies beneath. On drywall, it can penetrate the paper facing. On plaster, it goes even deeper.
According to the Centers for Disease Control and Prevention (CDC), secondhand smoke contains more than 7,000 chemicals, at least 70 of which are known carcinogens. When those chemicals settle on your walls, they form a sticky film of tobacco smoke residue (TSR). Over years of indoor smoking, that film thickens, yellows, and begins to compromise the paint and structural surface underneath.
The result? That distinctive yellow-brown discoloration around light switches, outlet covers, near windows, and on ceilings. Not just ugly, actively problematic for indoor air quality, which the U.S. Environmental Protection Agency (EPA) identifies as one of the top five environmental risks to public health.
The yellowing you see on walls is largely caused by the oxidation of nicotine itself. Fresh nicotine is colorless. As it ages and reacts with oxygen and light, it forms cotinine and other breakdown compounds, and turns that unmistakable shade of dingy amber. That’s not just a stain. That’s chemistry happening on your wall, every single day.
Common visible signs of tobacco smoke residue on walls include:
Most people know about firsthand smoke, what the smoker inhales, and secondhand smoke, what bystanders breathe. Almost nobody talks about thirdhand smoke, and it’s the one that actually lives in your walls long after the last cigarette was smoked.
Thirdhand smoke is the toxic chemical residue that remains on surfaces after the visible smoke has cleared. It’s also called stale tobacco smoke or tobacco smoke residue (TSR). Research from the Thirdhand Smoke Resource Center at UC San Diego confirms that these chemicals don’t just sit passively on surfaces, they react with common indoor pollutants and re-emit back into the air over time, creating ongoing indoor air contamination long after the smoking stopped.
The chemicals in thirdhand smoke include tobacco-specific nitrosamines (TSNAs), including NNK, a potent lung carcinogen, as well as formaldehyde, hydrogen cyanide, and arsenic compounds. When someone touches a contaminated wall and then touches their face, they directly ingest these compounds. This is called dermal absorption, and it’s a major exposure pathway that most people never consider.
Children are at the highest risk. They touch surfaces constantly, crawl on floors, and put their hands in their mouths repeatedly throughout the day. Research has linked thirdhand smoke exposure in young children to DNA damage, behavioral effects, and increased rates of respiratory illness. Heavy thirdhand smoke contamination in home environments has also been associated with elevated risk factors for Sudden Infant Death Syndrome (SIDS).
Pet owners: your animals face the same risk. Dogs and cats who live in homes with thirdhand smoke surface contamination groom themselves continuously and ingest carcinogenic compounds daily through this behavior. It isn’t a minor risk, it’s a genuine, ongoing health exposure.
Masking the odor with air fresheners, candles, or plug-in diffusers does not remove thirdhand smoke chemicals. It covers the smell while the contamination continues beneath the surface. This is one of the most common and costly mistakes homeowners make, spending money on odor masking instead of odor elimination.
True remediation requires physically removing the chemical residue from surfaces through cleaning, and then encapsulating what remains with an appropriate primer to stop re-emission. Surface cleaning alone, without the encapsulation step, often allows residual chemicals to migrate back to the surface within weeks or months.
One of the most significant gaps in how to remove cigarette smoke from walls guides is that they treat all walls the same. They’re not. The type of surface underneath the paint determines how deeply smoke has penetrated, and what cleaning strategy will actually work.
Surface Type | Smoke Penetration | Cleaning Difficulty | Best Approach |
Painted drywall (latex paint) | Moderate — nicotine penetrates latex paint slowly but builds up over years | Moderate | TSP or dish soap + baking soda solution; Zinsser BIN primer before repainting |
Painted drywall (oil-based paint) | Low to moderate — oil-based paint is less porous | Easier | Ammonia solution or TSP cleaner; may not need full repaint |
Bare/unprimed drywall | Very high — drywall paper facing absorbs deeply | Very hard | May require skim coat or drywall replacement; encapsulation primer essential |
Plaster walls | High — plaster is highly porous and alkaline; nicotine bonds strongly | Hard | Multiple TSP washes; shellac-based primer (Zinsser BIN) mandatory before painting |
Wallpapered walls | Very high — paper wallpaper absorbs smoke residue into fibers | Very hard — often must strip | Strip wallpaper entirely; clean bare surface underneath; reprime |
Wood paneling | High — wood grain channels absorb tar and nicotine deeply | Hard | TSP scrub; light sanding; oil-based stain-blocking primer; topcoat |
Brick / masonry | Very high — extremely porous, nearly impossible to fully decontaminate | Very hard | TSP with stiff brush; may need professional chemical washing; encapsulation |
Here’s something counterintuitive that almost every guide skips: if you’ve already painted over a smoke-stained wall without cleaning or priming it first, you’ve made the problem harder to solve, not easier. Standard paint doesn’t seal nicotine in. Nicotine migrates through standard paint. Within two to four weeks of applying a fresh coat without proper preparation, the yellow-brown staining bleeds right back through your new paint. This is called nicotine bleed-through, and it’s one of the most demoralizing experiences in home improvement.
The only solution: clean the wall thoroughly first, then apply a shellac-based encapsulation primer before any topcoat. There are no shortcuts here that actually work long-term.
Do not skip the PPE. Dry tobacco smoke residue becomes airborne during cleaning, and ammonia vapors present a genuine respiratory hazard in enclosed spaces. Use all of the following:
Never mix ammonia and bleach under any circumstances. This combination produces toxic chloramine gas. In a poorly ventilated room already containing chemical residue, the reaction can happen rapidly and without adequate warning.
Mix one gallon of hot water with three tablespoons of dish soap and half a cup of baking soda. This is appropriate for mild tobacco residue on latex-painted walls and is gentle enough not to damage the paint surface. Good starting point for light yellowing or a home where smoking was occasional.
Mix equal parts white vinegar and warm water in a spray bottle. The acetic acid in white vinegar breaks down alkaline nicotine compounds. The smell during application is strong but dissipates within an hour. Appropriate for rooms with noticeable but not severe staining. Not sufficient for walls with years of heavy exposure.
Available at Home Depot and Lowe’s nationwide. Mix one quarter cup of TSP with one gallon of warm water. This is the industrial-grade option, the same product professional restoration crews use. The alkaline phosphate ions actively break down the oily nicotine and tar compounds, making them water-soluble and removable. Requires gloves, goggles, respirator, and strong ventilation. Critically: rinse the wall thoroughly after TSP cleaning. TSP residue left on the surface will interfere with paint adhesion and cause peeling.
Mix one part household ammonia with four parts water. Effective for dissolving stubborn tar and nicotine buildup that resists other cleaners. Use only with all windows fully open and a fan running. Never combine with bleach on the same surface or on the same day.
A safer, non-toxic commercial degreaser that performs well on moderate smoke residue on walls and ceilings. Biodegradable and significantly less harsh than ammonia, making it a good choice for households with children or pets where chemical exposure during cleaning is a concern. Dilute per label instructions.
Follow this sequence in order. Skipping steps, particularly drying and rinsing, is where most DIY attempts fail.
Open all windows and doors. Set up a box fan in one window blowing outward to create negative pressure, this pulls contaminated air out of the room rather than recirculating it. Cover floors with drop cloths. Move furniture to the center of the room and cover with plastic sheeting. Turn off the HVAC system before you begin, so you don’t push dislodged particles and chemical vapors through the ductwork into other areas of the home.
Use a vacuum with a soft brush or upholstery attachment and pass over every wall surface from top to bottom in overlapping strokes. This removes loose, dry tobacco residue and prevents it from turning into a muddy smear when liquid is applied. Skipping this step significantly reduces the effectiveness of the wet cleaning stage that follows.
Pick a spot behind a door or inside a closet. Apply your chosen solution and wait five minutes. Check for paint lifting, color change, surface damage, or whitening. This five-minute test can save you from damaging an entire room. Worth doing every single time, regardless of which product you’re using.
Work in roughly three-by-three-foot sections. Dip your sponge or microfiber cloth into the cleaning solution, wring it out so it is damp but not dripping, and scrub in circular motions with moderate pressure. You’ll notice the cloth turning brown, that’s tobacco smoke residue coming off the surface. Change clothes or sponges frequently. Critical point: do not oversaturate the wall. If drywall absorbs excessive liquid, the paper facing can delaminate and bubble, creating a new repair problem.
With a separate bucket of clean water and a fresh cloth, wipe down each section immediately after cleaning it. This step removes both the cleaning solution and the loosened tobacco residue from the wall surface. TSP particularly must be thoroughly rinsed, any residue remaining on the wall will prevent primer and paint adhesion. Two rinse passes per section is recommended for heavy contamination.
Wipe down each section with a clean dry cloth, then allow the wall to air dry completely for a minimum of 24 to 48 hours before applying any primer or paint. Run a dehumidifier if you’re in a humid climate, Florida, Louisiana, coastal Georgia and the Carolinas, this step is especially important for you. Moisture trapped behind the primer creates ideal conditions for mold growth between the primer and the wall surface.
Unscrew outlet plates, light switch covers, vent screens, and radiator covers. Nicotine accumulates heavily around these fixtures because airflow channels smoke directly toward them over years of circulation. Clean the wall behind them separately using your cleaning solution. Either replace the covers entirely, or scrub them with ammonia solution, rinse thoroughly, and reinstall clean.
Here is a field-tested technique that professional restorers use: dampen a clean white cloth with warm water and press it firmly against the cleaned wall for ten seconds. Then smell the cloth directly. If it still carries a smoke odor, the residue has not been fully removed and the wall requires another cleaning pass, or escalation to TSP or professional chemical washing. Do not apply primer or paint over a wall that still smells. The odor will return within weeks, and you’ll be doing the entire job again from the beginning.
Cigarette smoke rises. In most rooms where heavy indoor smoking occurred, the ceiling carries the highest concentration of nicotine residue, often significantly more than the walls. Use an extension pole with a mop head or attached sponge and apply the same cleaning method overhead. Expect to use considerably more solution on ceilings and to change clothes more frequently than on walls.
Mix one quarter cup of salt into one quart of warm water to create a mild abrasive cleaning paste. Apply with a cloth and use gentle circular pressure. The salt particles lightly abrade the top layer of contamination without damaging the underlying paint. Best applied to isolated heavy patches rather than as a whole-wall treatment.
On textured walls, orange peel, skip-trowel, and knockdown textures common throughout Texas, Arizona, Nevada, and the Southwest, a soft-bristle brush with TSP solution reaches into the texture valleys where a flat sponge cannot. Apply light pressure. Aggressive scrubbing will knock off texture peaks and create visible surface damage that requires patching before repainting.
For walls where years of smoking have created an almost waxy, heavily layered nicotine and tar deposit, fine-grit sandpaper (150 to 220 grit) can remove the top layer of contamination along with some paint. Always follow sanding with a TSP wipe-down to remove sanding dust before any primer is applied. Wear your N95 respirator during sanding without exception, you are aerosolizing concentrated nicotine and carcinogenic particulates directly into your breathing zone.
Restoration companies use industrial-strength chemical washes, often proprietary alkaline cleaners significantly more concentrated than consumer-grade TSP, that are substantially more effective on heavy contamination. For walls in homes where heavy smoking occurred over five or more years, professional chemical washing is frequently the most practical option short of surface removal.
In extreme cases, a decade or more of heavy indoor smoking in an enclosed space, nicotine and tar compounds soak entirely through drywall and into the wall cavity insulation behind it. At that point, cleaning the surface accomplishes very little. The drywall must be removed and replaced. This situation is not rare in rental apartments across the country where the same heavy smoker occupied a unit for many years without the property being properly remediated between tenancies.
Standard latex primers, the kind used on new construction or general repainting projects, are not designed to block nicotine bleed-through. Nicotine is oily and chemically alkaline. It migrates through water-based latex primers like they barely exist. Within two to four weeks of painting with a standard primer over inadequately cleaned walls, the yellow staining reappears on the fresh white paint surface.
At that point, you haven’t solved the problem. You’ve just spent money on primer and paint while decorating a nicotine-contaminated wall.
Zinsser BIN is the professional restoration industry’s standard choice for smoke-damaged walls. Shellac creates a genuinely impermeable barrier over nicotine and tar residue, preventing bleed-through from migrating to the topcoat. It dries to touch in 30 minutes, adheres excellently to drywall, plaster, wood, and previously painted surfaces, and seals smoke odor effectively. Cleanup requires denatured alcohol rather than water. Available at Home Depot, Lowe’s, and most independent hardware stores across the U.S. Expect to pay approximately $30 to $40 per quart.
Kilz Original in its oil-based formulation (not Kilz 2 or Kilz Latex, which are water-based) is another highly effective stain-blocking primer for tobacco smoke residue. It penetrates deeply, seals stains aggressively, and blocks odor effectively on plaster and heavily contaminated drywall. Cleanup requires mineral spirits. Drying time is longer than Zinsser BIN, but it performs excellently on plaster walls where deep penetration matters.
This is an appropriate option only for very light smoke staining. Do not use Kilz 3 or any water-based primer on walls with moderate to heavy nicotine contamination. If stains bleed through after application, you will need to strip back to the bare surface and restart with a shellac-based primer, costing more time and money in the long run than doing it correctly the first time.
Shellac-based primer seals, or encapsulates, remaining residue. It does not remove it. For light to moderate contamination where cleaning removed the majority of the tobacco smoke residue, encapsulation is a permanent and effective solution. For severe contamination, encapsulation slows re-emission dramatically but may not stop it entirely over the very long term. When contamination is severe, clean as aggressively as possible before priming rather than relying on primer to compensate for incomplete cleaning.
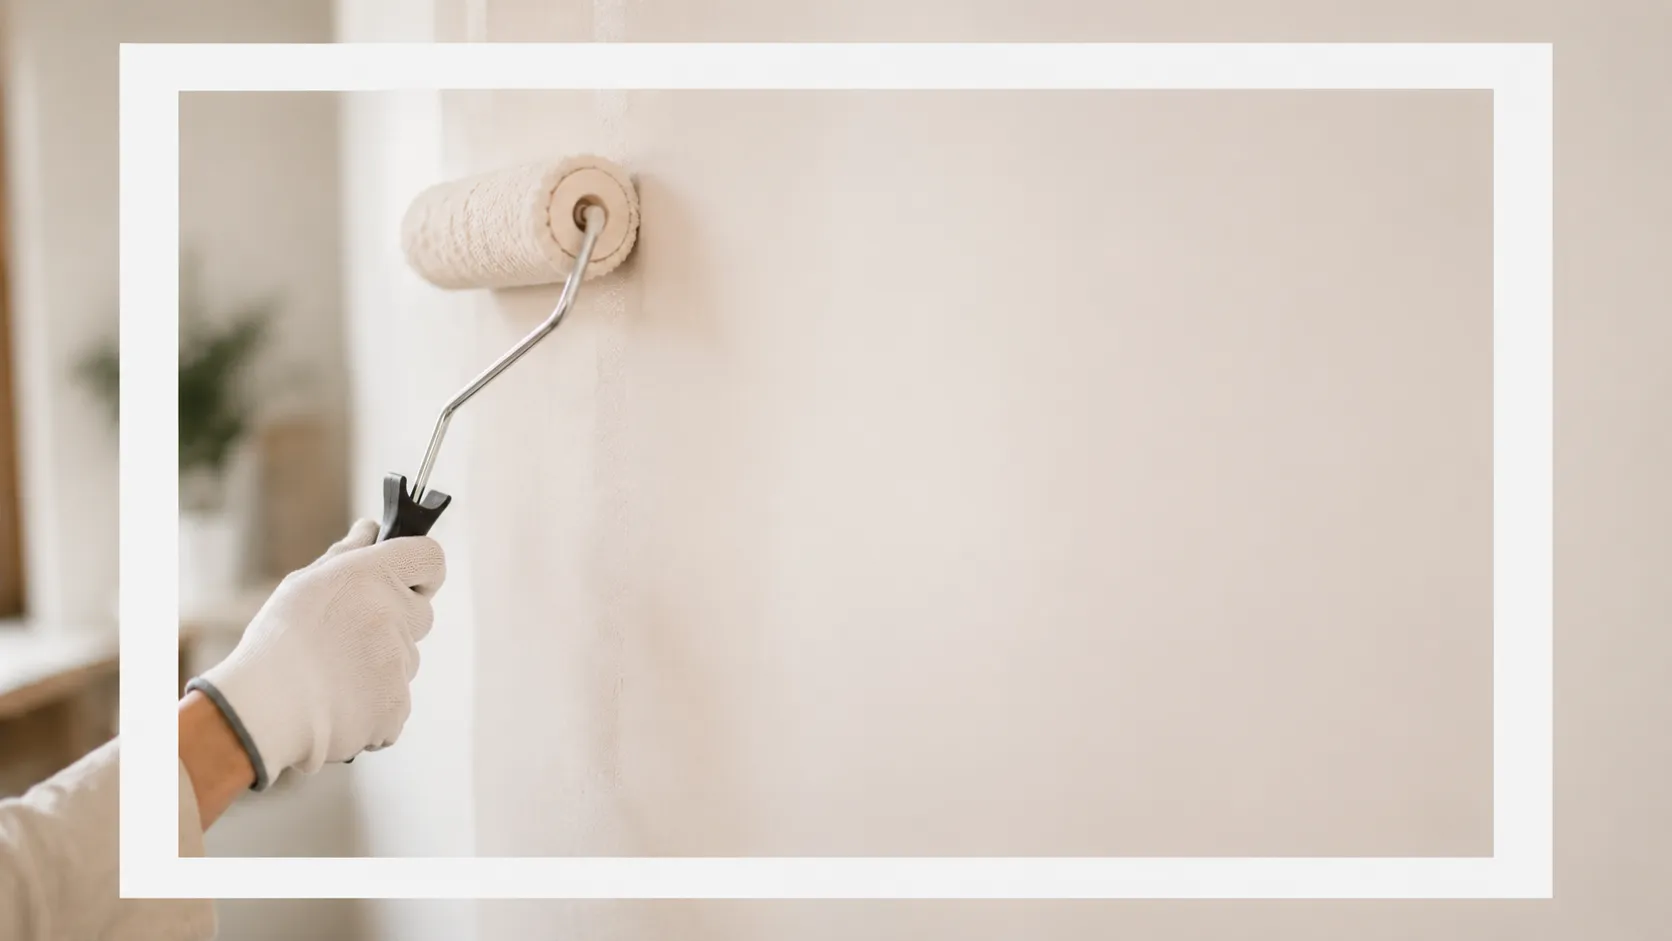
Once your shellac or oil-based primer has fully cured, allow 24 to 48 hours, apply two coats of a high-quality latex topcoat with built-in stain resistance. Benjamin Moore Aura, Sherwin-Williams Duration, and Behr Premium Plus Ultra are all solid choices available throughout the U.S. Apply in thin, even coats. Thick paint coats trap solvents, dry unevenly, and are especially problematic on warm, humid days in the South and Midwest.
Here’s the scenario nobody warns about: You scrub every wall. You apply Zinsser BIN. You repaint with two coats of Sherwin-Williams Duration. The room smells fresh and clean. You turn on the air conditioning. The smell comes flooding back within minutes.
Cigarette smoke particles are fine enough to be drawn into air intake vents and deposited throughout ductwork during normal operation. Every time your heating or cooling system runs, those particles recirculate through the entire home. This is precisely why surface cleaning alone, even thorough, professional-quality surface cleaning, often fails to permanently eliminate cigarette smoke odor from heavily contaminated homes.
Replace all HVAC filters immediately and use MERV-13 or higher-rated filters going forward, as these capture fine smoke particles that lower-rated filters allow to pass through. Have ductwork professionally cleaned, the average cost in the U.S. for a standard home ranges from $300 to $700. Clean or replace all HVAC return and supply grilles, as these surfaces accumulate heavy nicotine deposits directly. Consider adding a whole-home air purifier with both a HEPA filtration stage and an activated carbon stage, activated carbon specifically adsorbs smoke odor compounds rather than simply filtering particles.
For severe HVAC contamination, professional vapor-phase deodorization or hydroxyl generator treatment may be necessary to fully address the ductwork chemistry.
Ozone generators are sometimes marketed as the definitive solution to smoke smell. They oxidize and neutralize airborne odor molecules and can provide meaningful temporary relief. However, they do not remove embedded chemical compounds from walls, floors, furniture, or ductwork. The odor returns when the remaining surface residue continues to off-gas. Additionally, ozone generators produce reactive oxygen species that can create new harmful compounds when reacting with residual nicotine on surfaces. The Thirdhand Smoke Resource Center specifically notes this secondary chemical reaction concern. Always vacate the space completely during ozone treatment, and ventilate thoroughly for several hours before re-entry. Ozone concentrations above 0.1 ppm are hazardous to humans and pets.
In most U.S. states, landlords are legally required to provide habitable housing, and a property with severe smoke contamination may fail habitability standards depending on your state’s specific code. California has explicit tenant protections around indoor air quality. Texas, Florida, New York, Illinois, and Washington each have different standards and tenant remedies.
Before spending any of your own money on cleaning a pre-existing smoke problem, document everything with timestamped photos and video on the day you receive the keys. Submit a written notice to your landlord detailing the condition. Keep copies of all correspondence.
If a previous tenant caused the smoke contamination and your landlord later attempts to charge you for it when you move out, that move-in documentation is your legal protection. Pre-existing cigarette smoke damage cannot lawfully be deducted from an outgoing tenant’s security deposit in most U.S. states. If you’re uncertain about your specific state’s rules, contact your local tenant rights organization or a legal aid office for guidance.
Request professional cleaning and repainting in writing before signing your lease, and keep a copy of any promises made. Ask specifically that the landlord use a shellac-based stain-blocking primer rather than standard paint over existing stains. If the landlord refuses remediation and you still want the unit, negotiate a rent reduction to cover your cleaning costs. Replace HVAC filters immediately upon move-in at your own expense, it’s inexpensive and makes an immediate difference. Run a HEPA air purifier with an activated carbon stage from your first day in the unit.
Homes with significant cigarette smoke damage sell for 20 to 29 percent less than comparable non-smoking properties according to real estate industry research. If you purchased a smoke-contaminated home at a discount, you likely have some budget flexibility for proper remediation. If you paid market value and the smoke damage was not disclosed before sale, consult a real estate attorney about seller disclosure violations in your state, many states have explicit material disclosure requirements that cover known smoking history.
Standard home inspections do not test for thirdhand smoke surface contamination. A thorough inspector will note visible nicotine staining and may flag it in their report, but they will not test air quality for tobacco-specific nitrosamines or measure surface nicotine loading. Fresh paint applied over stained walls before listing is a well-known cosmetic cover-up, experienced inspectors know to look for telltale signs like paint that appears newer than the rest of the home, or subtle yellowing patterns that show through recent paint.
For a full home with heavy contamination, budget $800 to $2,500 for thorough DIY remediation including materials. Professional remediation ranges from $5,000 to $25,000 depending on home size, severity, and regional labor costs. For extreme cases requiring structural remediation, drywall removal, ductwork replacement, insulation replacement, costs can exceed $50,000 in a large, severely contaminated property.
Approach | Cost (single room) | Cost (whole home) | Best for |
DIY cleaning only | $30–$80 | $100–$300 | Light to moderate staining, DIY-confident homeowners |
DIY cleaning + primer + repaint | $200–$500 | $800–$2,500 | Moderate staining, most homeowners |
Professional cleaning only | $300–$600 | $1,500–$4,000 | Heavy staining, time-limited or renter situations |
$800–$2,000 | $5,000–$25,000 | Severe contamination, long-term smoking history | |
Full demolition + rebuild | $2,000–$6,000 | $20,000–$60,000+ | Extreme cases — decade+ of heavy indoor smoking |
Contact a professional if the smoke odor persists after two full cleaning cycles with TSP, if visible nicotine staining bleeds through after applying Kilz Original or Zinsser BIN primer, if the home shows signs of structural penetration into wall cavity insulation, or if you are dealing with a commercial property or multi-unit building with contamination across multiple units.
Look specifically for IICRC S520-certified restoration professionals. The Institute of Inspection Cleaning and Restoration Certification establishes the national standard for smoke damage remediation in the U.S., and certification confirms training and methodology that meets that standard.
This is one of the biggest unaddressed gaps in most guides on cigarette smoke wall cleaning, and it’s a growing issue in homes and rentals across the country.
E-cigarette aerosol deposits nicotine and other chemical compounds on surfaces just as combusted cigarette smoke does, creating thirdhand chemical residue on walls, ceilings, and furniture. The Thirdhand Smoke Resource Center confirms that cannabis smoke and vaping both create thirdhand residue containing some of the same carcinogenic compounds found in traditional tobacco smoke residue.
The critical difference from cigarette smoke: the visual evidence is often absent. You won’t necessarily see the yellow-brown staining associated with cigarette nicotine. The walls may look completely clean. But the chemical contamination, nicotine, formaldehyde, acrolein, and other compounds, is still present on the surface and actively off-gassing.
If you’re dealing with a rental or purchased home where heavy vaping occurred, use the full cleaning protocol regardless of how the walls look: TSP or dish soap and baking soda solution, thorough rinse, full dry time, shellac-based primer if repainting. Chemistry requires the same approach. The lack of visible staining is not evidence of absence.
Cannabis smoke creates thirdhand smoke contamination with many of the same carcinogens found in tobacco residue. The same wall cleaning approach applies, with one addition: cannabis residue tends to leave a more visible, darker, and distinctly resinous stain that frequently requires TSP or professional chemical washing to break down. The odor compounds from cannabis smoke also bind aggressively to porous surfaces and may require multiple cleaning passes before a shellac-based primer is applied.
White vinegar effectively neutralizes alkaline nicotine compounds and removes light to moderate tobacco smoke residue. However, for heavy contamination from years of heavy indoor smoking, vinegar alone cannot penetrate deeply enough to fully decontaminate porous surfaces like drywall, plaster, or wood. Use vinegar for light cases and maintenance cleaning. Escalate to TSP for moderate to heavy staining.
Cigarette smoke odor often returns because residue remains on hidden surfaces like ceilings, vents, and window frames, or because smoke particles have soaked into walls and continue releasing odors. If the smell persists after cleaning, deep cleaning with TSP and applying an odor-blocking primer may be necessary to seal in lingering smoke residue.
Zinsser BIN shellac-based primer is the industry standard. It creates a genuinely impermeable barrier against nicotine and tar migration, preventing bleed-through to the topcoat. Kilz Original in its oil-based formulation is a strong alternative. Avoid all water-based primers on heavily contaminated walls — they do not adequately block nicotine migration.
Thorough cleaning significantly reduces thirdhand smoke risk but may not eliminate it entirely on deeply porous surfaces — unprimed drywall, plaster, and rough wood being the most difficult. Shellac-based encapsulation primer helps trap remaining residue and prevent re-emission. In homes with infants or young children, professional chemical washing followed by encapsulation is the recommended standard of care.
Not with standard paint or standard primer. Nicotine migrates through latex paint and water-based primers within weeks, producing visible yellow bleed-through on fresh paint. The wall must be cleaned first, then sealed with a shellac-based or oil-based stain-blocking primer before any topcoat is applied. Skipping this sequence means doing the entire job twice.
Cigarette smoke residue can remain in walls for years or even decades if left untreated. Nicotine and other smoke particles can continue releasing odors long after smoking has stopped. Proper cleaning and sealing with an odor-blocking primer can significantly reduce lingering smells and help prevent them from returning.
Knowing how to remove cigarette smoke from walls properly changes everything about the outcome. The homeowner who grabs a sponge, wipes at the wall with soapy water, and rolls fresh paint over it will be back doing exactly the same job in six months when the nicotine bleeds through again. The homeowner who vacuums the surface first, scrubs with TSP on heavy tobacco smoke residue, rinses every section twice, waits the full 48 hours of dry time, reaches for Zinsser BIN, and applies two even coats of a quality topcoat, that person has a clean, sealed wall for years.
Don’t forget the ceiling. It almost always carries more tobacco smoke residue than any wall in the room. Don’t forget the HVAC, replacing filters and cleaning grilles costs almost nothing and makes a noticeable difference in how quickly odor returns. Don’t forget behind the outlet covers and switch plates, where nicotine concentrates along airflow paths and recontaminates a room you’ve otherwise cleaned completely.
And if the smell comes back after two full cleaning cycles with TSP, stop fighting it with consumer products alone. Call an IICRC-certified professional. There are jobs, particularly in older rental apartments in cities like New York, Chicago, Los Angeles, and Miami, where the same heavy smoker occupied a unit for a decade or more, where professional chemical washing and encapsulation primer are simply the right tools for the scale of the problem.
You’ve got this. Start at the top of the room, work systematically, don’t rush the drying step, and use the right primer before you paint. That last point, the unsexy, unglamorous drying and priming step, is the one detail that separates a permanent fix from a temporary one. Give it the time it requires, and you won’t have to do this job twice.